Ginger (Zingiber officinale) is a versatile, spicy root widely used in culinary dishes, teas, and natural remedies. Growing ginger at home is a rewarding and straightforward process that allows you to enjoy fresh, flavorful roots right from your kitchen or garden. This tropical perennial thrives in warm, humid conditions and can be grown indoors or outdoors, making it accessible for gardeners in various climates. This guide will walk you through every step to successfully grow ginger at home, ensuring a bountiful harvest of this aromatic root.
Why Grow Ginger at Home?
Ginger is prized for its zesty flavor and health benefits, including anti-inflammatory and digestive properties. Homegrown ginger is fresher and more potent than store-bought varieties, and you can harvest both roots and young shoots for cooking. Ginger is hardy in USDA zones 9–11 but can be grown in containers in cooler climates, making it ideal for indoor or patio gardening. Its lush, green foliage also adds a tropical aesthetic to your space.
Step-by-Step Guide to Growing Ginger at Home
1. Choose Quality Ginger Rhizomes
- Selecting Rhizomes: Purchase fresh, organic ginger rhizomes from a grocery store, nursery, or farmer’s market. Look for plump, firm rhizomes with smooth, shiny skin and visible “eyes” (small growth buds). Avoid shriveled or moldy pieces.
- Variety Note: Most grocery store ginger is suitable for planting, as it’s typically Zingiber officinale. For unique flavors, seek out specialty varieties like ‘Hawaiian Ginger’ or ‘Thai Ginger’ from nurseries.
- Timing: Buy rhizomes in late winter or early spring for planting, as ginger requires a long growing season (8–10 months).
2. Select the Ideal Location
- Sunlight: Ginger prefers partial shade or filtered sunlight, needing 4–6 hours of indirect light daily. Too much direct sun can scorch leaves, while too little light slows growth.
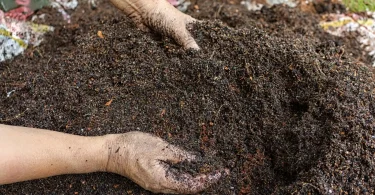
- Soil Type: It thrives in rich, well-draining, loamy soil with a pH of 5.5–6.5. A mix of potting soil and compost works well.
- Site Considerations: Choose a warm, humid spot protected from strong winds. For indoor growing, a bright bathroom or kitchen with high humidity is ideal.
3. Prepare the Rhizomes
- Pre-Sprouting (Optional): To encourage faster growth, soak rhizomes in lukewarm water for 12–24 hours. Alternatively, place them in a plastic bag with a damp paper towel in a warm spot (70–80°F) until eyes begin to sprout (1–2 weeks).
- Cutting Rhizomes: If the rhizome is large, cut it into 1–2 inch pieces, ensuring each piece has at least one eye. Allow cut ends to dry for 1–2 days to form a callus, preventing rot.
4. Prepare the Soil
- Loosen the Soil: For garden planting, dig to a depth of 8–12 inches to ensure loose, fertile soil for root growth.
- Amend the Soil: Mix in compost or well-rotted manure to enrich the soil. Add sand or perlite if drainage is poor, as ginger dislikes waterlogged soil.
- Test Drainage: Water the area and ensure it drains within a few hours. Use raised beds or containers if soil is heavy or clay-based.
- Soil Testing (Optional): Use a soil test kit to confirm pH (5.5–6.5). Adjust with lime (to raise pH) or sulfur (to lower pH) if needed.
5. Plant the Ginger
- Timing: Plant in spring (March–April) after the last frost in zones 9–11, or start indoors in cooler zones (5–8) for transplanting later.
- Planting Method:
- Dig shallow trenches or holes 2–4 inches deep.
- Place rhizome pieces horizontally, eyes facing up, and cover with 1–2 inches of soil.
- Space pieces 6–8 inches apart to allow room for growth.
- Container Planting: Use a wide, shallow pot (12–18 inches wide, 10–12 inches deep) with drainage holes. Fill with a mix of potting soil, compost, and perlite (2:1:1 ratio). Plant rhizomes 2 inches deep, 6 inches apart.
- Watering: Water lightly after planting to settle the soil. Keep soil consistently moist but not soggy during germination (2–4 weeks).
6. Care for Your Ginger Plants
- Watering: Provide 1–2 inches of water per week to keep soil evenly moist, especially during active growth. Water when the top inch of soil feels slightly dry, typically every 3–5 days. Avoid waterlogging to prevent rot.
- Fertilizing: Apply a balanced, water-soluble fertilizer (e.g., 10-10-10) every 4–6 weeks during spring and summer. Alternatively, use compost tea or fish emulsion for organic feeding.
- Mulching: Apply a 1–2 inch layer of organic mulch (e.g., straw, bark, or shredded leaves) to retain moisture, suppress weeds, and maintain soil warmth.
- Humidity: Maintain high humidity (50–70%) for indoor plants by misting leaves or using a pebble tray. Outdoors, choose a naturally humid spot or mulch heavily.
- Pest and Disease Management: Monitor for pests like aphids or spider mites. Treat with insecticidal soap or neem oil. Prevent root rot by ensuring good drainage and avoiding overwatering.
7. Growing Ginger Indoors
- Pot Selection: Use a wide, shallow container with drainage holes to accommodate rhizome spread.
- Soil Mix: Fill with a well-draining mix of potting soil, compost, and perlite (2:1:1).
- Care: Place in bright, indirect light (e.g., near an east-facing window). Water when the top inch of soil is dry, fertilize monthly, and maintain humidity with misting or a humidifier. Keep temperatures between 70–85°F.
- Repotting: Repot every 1–2 years or when rhizomes crowd the pot, dividing large clumps if needed.
8. Harvesting Ginger
- Timing: Harvest after 8–10 months when leaves yellow and die back, typically in late fall or winter. For young, tender ginger, harvest after 4–6 months.
- Method: Gently dig around the plant with a trowel or fork to lift rhizomes. Cut off desired portions and replant remaining rhizomes for future growth.
- Storage: Store fresh ginger in a cool, dry place for up to 1 month or in the refrigerator (wrapped in a paper towel and plastic bag) for 2–3 months. Dry or freeze for longer storage.
9. Overwintering in Cooler Climates
- Zones 9–11: Mulch heavily (4–6 inches) in late fall to protect rhizomes from light frosts. Cut back dead foliage in winter.
- Zones 5–8: Grow in containers and move indoors before the first frost. Place in a bright, warm spot (65–75°F) and reduce watering during dormancy.
- Storage Option: After harvest, store rhizomes in a cool (50–60°F), dry place in peat moss or sand until spring replanting.
Common Challenges and Solutions
- Slow Growth: Insufficient warmth, light, or nutrients. Ensure temperatures above 65°F, provide filtered light, and fertilize regularly.
- Root Rot: Overwatering or poor drainage. Use well-draining soil, water only when needed, and remove affected rhizomes.
- Pests: Aphids or spider mites may affect foliage. Treat with insecticidal soap or neem oil and improve air circulation.
- Yellowing Leaves: Overwatering, low light, or nutrient deficiency. Adjust watering, provide brighter light, and apply a balanced fertilizer.
Tips for Success
- Succession Planting: Plant rhizomes every few weeks for a continuous supply of fresh ginger.
- Companion Planting: Pair with shade-tolerant plants like ferns or hostas in garden beds to maximize space.
- Culinary Uses: Use young ginger for milder flavor in stir-fries or teas, and mature ginger for spicier dishes or baking.
- Zone Considerations: In zones 5–8, grow indoors or in containers to protect from frost. In zones 9–11, ginger thrives outdoors with proper care.
- Health Benefits: Incorporate homegrown ginger into teas or smoothies for its anti-inflammatory and digestive properties.
Fun Facts About Ginger
- Historical Use: Ginger has been cultivated for over 5,000 years, used in cooking and medicine across Asia and beyond.
- Tropical Beauty: Its reed-like foliage adds a lush, tropical vibe to gardens or indoor spaces.
- Medicinal Value: Ginger is widely used to soothe nausea, aid digestion, and reduce inflammation.
Troubleshooting Table
| Issue | Cause | Solution |
|---|---|---|
| Slow or no sprouting | Cold temperatures or poor rhizomes | Ensure 70–80°F, use fresh rhizomes with visible eyes, pre-sprout if needed. |
| Root rot | Overwatering or poor drainage | Use well-draining soil, water sparingly, remove affected rhizomes. |
| Pests | Aphids or spider mites | Treat with insecticidal soap or neem oil; improve air circulation. |
| Yellowing leaves | Overwatering or low light | Reduce watering, provide 4–6 hours of filtered light, fertilize lightly. |
Conclusion
Growing ginger at home is a delightful way to enjoy fresh, spicy roots and lush greenery. With its tropical charm and versatile uses, ginger is a must-have for any home gardener. By selecting quality rhizomes, providing proper care, and maintaining a warm, humid environment, you’ll enjoy a bountiful harvest. Start your ginger-growing journey this spring, and savor the flavor of homegrown ginger in your culinary creations!


