Rain lilies (Zephyranthes spp.) are charming, low-maintenance perennials that burst into vibrant blooms after rainfall, earning their name. These delicate flowers, available in shades of white, pink, and yellow, are perfect for beginners and seasoned gardeners alike. One of the easiest ways to propagate rain lilies is by using their pups, small bulb offsets that form around the parent bulb. This guide will walk you through the simple, rewarding process of growing rain lilies from pups, with powerful tips to ensure a thriving, blooming garden.
Why Grow Rain Lilies from Pups?
- Cost-Effective: Pups are free, naturally produced by mature rain lily bulbs.
- Easy Propagation: Pups are simple to separate and plant, making them ideal for beginners.
- Fast Results: Pups grow quickly, often blooming within a year.
- Versatile Beauty: Rain lilies enhance gardens, borders, containers, or indoor spaces with their stunning flowers.
- Low Maintenance: These hardy plants require minimal care once established.
Step-by-Step Guide to Growing Rain Lilies from Pups
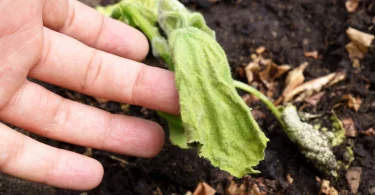
1. Identify and Harvest Pups
Rain lilies produce pups as small bulbs attached to the base of the parent bulb. To harvest:
- Timing: Wait until late spring or early summer, after the blooming season, when the plant is dormant or semi-dormant.
- Digging: Gently dig around the base of a mature rain lily plant using a trowel or garden fork. Be careful not to damage the bulbs.
- Separation: Look for small bulbs (pups) attached to the main bulb. Gently twist or pull them off, ensuring each pup has some roots attached.
- Care Tip: Choose healthy, firm pups without signs of rot or damage for the best results.
2. Prepare the Pups
Before planting, prepare the pups to ensure successful growth:
- Clean: Remove excess soil from the pups and trim any dead or damaged roots.
- Soak (Optional): Soak pups in lukewarm water for a few hours to hydrate them and encourage root growth.
- Pro Tip: Dust the cut ends with a fungicide powder to prevent rot, especially in humid climates.
3. Choose the Right Planting Location
Rain lilies thrive in conditions that mimic their natural habitat:
- Light: Full sun to partial shade (4–6 hours of sunlight daily).
- Soil: Well-draining, loamy soil with a pH of 6.0–7.0. Add sand or compost if soil is heavy.
- Location: Plant in garden beds, borders, or containers. Rain lilies also do well in rock gardens or as ground cover.
- Care Tip: Ensure good drainage to prevent bulb rot, especially in rainy seasons.
4. Plant the Pups
Proper planting sets the stage for vibrant growth:
- Depth: Plant pups 1–2 inches deep, with the pointed end facing up.
- Spacing: Space pups 4–6 inches apart to allow room for growth and future bulb division.
- Watering: Water lightly after planting to settle the soil, keeping it moist but not soggy.
- Pro Tip: Add a thin layer of mulch (like bark or gravel) to retain moisture and regulate soil temperature.
5. Care for Your Rain Lilies
Rain lilies are low-maintenance but benefit from consistent care:
- Watering: Water sparingly, about once a week, allowing soil to dry out between waterings. Rain lilies are drought-tolerant once established.
- Fertilizing: Apply a balanced, slow-release fertilizer (e.g., 10-10-10) in spring to boost growth. Avoid over-fertilizing, which can reduce blooming.
- Light: Ensure at least 4 hours of sunlight daily for vibrant blooms.
- Care Tip: Reduce watering during dormancy (late fall to winter) to mimic their natural cycle.
6. Encourage Blooming
Rain lilies are famous for blooming after rain, but you can encourage flowers:
- Watering Trick: Simulate rainfall by giving plants a deep watering after a dry spell to trigger blooms.
- Deadheading: Remove spent flowers to promote more blooms and keep the plant tidy.
- Pro Tip: Be patient—pups may take 6–12 months to establish and bloom.
7. Divide and Propagate
Rain lilies multiply quickly, producing more pups over time:
- Timing: Divide clumps every 2–3 years in late spring or early summer to prevent overcrowding.
- Process: Dig up the clump, separate healthy pups, and replant them following the steps above.
- Care Tip: Share extra pups with friends or use them to expand your garden.

Creative Ways to Use Rain Lilies
- Container Gardens: Plant rain lilies in pots for patios, balconies, or indoor spaces.
- Garden Borders: Use them to create vibrant edges along pathways or flower beds.
- Rock Gardens: Pair with succulents or other low-maintenance plants for a stunning display.
- Mass Plantings: Plant in groups for a dramatic burst of color after rain.
- Indoor Accents: Grow in small pots on windowsills for year-round beauty.
Common Mistakes to Avoid
- Overwatering: Too much water can cause bulb rot. Ensure well-draining soil and moderate watering.
- Planting Too Deep: Pups planted too deep may struggle to emerge. Stick to 1–2 inches.
- Insufficient Light: Too much shade can reduce blooming. Place in a sunny or partially sunny spot.
- Neglecting Dormancy: Avoid heavy watering during the dormant period to prevent bulb damage.
Troubleshooting Tips
- No Blooms: Ensure adequate sunlight and simulate rainfall with deep watering. Young pups may need a season to mature.
- Yellowing Leaves: Check for overwatering or poor drainage. Adjust watering and ensure proper soil conditions.
- Pests: Watch for aphids or spider mites. Treat with neem oil or insecticidal soap.
Conclusion
Growing rain lilies from pups is an effortless and rewarding way to add stunning beauty to your garden or home. With their vibrant blooms, easy propagation, and low-maintenance care, these charming plants are perfect for beginners and experienced gardeners alike. By following this powerful guide—harvesting pups, planting them correctly, and providing simple care—you’ll create a thriving display of rain lilies that burst into bloom after every shower. Start your rain lily journey today and transform your space with these delightful, resilient flowers!