
Christmas Cactus Propagation: Have you ever found yourself captivated by the enchanting allure of the Christmas Cactus? This exotic holiday plant boasts a unique beauty that has captured the hearts of many, and it’s fascinating journey from the lush forests of Brazil to window sills all around the world only adds to its mystique.
Christmas Cactus, a fascinating plant with a unique backstory and intriguing features that sets it apart from its botanical brethren. Officially named Schlumbergera bridgesii, the Christmas Cactus is a delightful departure from the traditional idea of cacti as heat-loving desert dwellers.
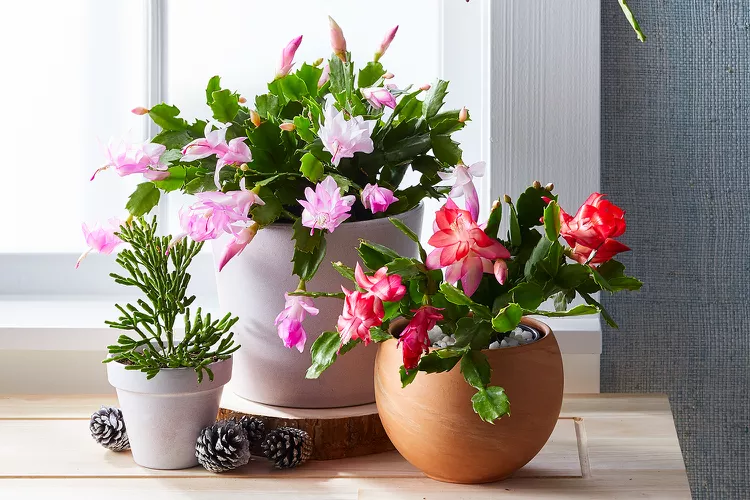
Cloud forests of Brazil are home to the Christmas Cactus, an environment far different from the normal desert landscapes associated with cacti. There is thick fog and less sunlight in these forests than in other tropical regions. The Christmas cactus has adapted to its harsh desert environment by developing flattened, leafy stems, brilliant blooms, and a penchant for bright, indirect light.
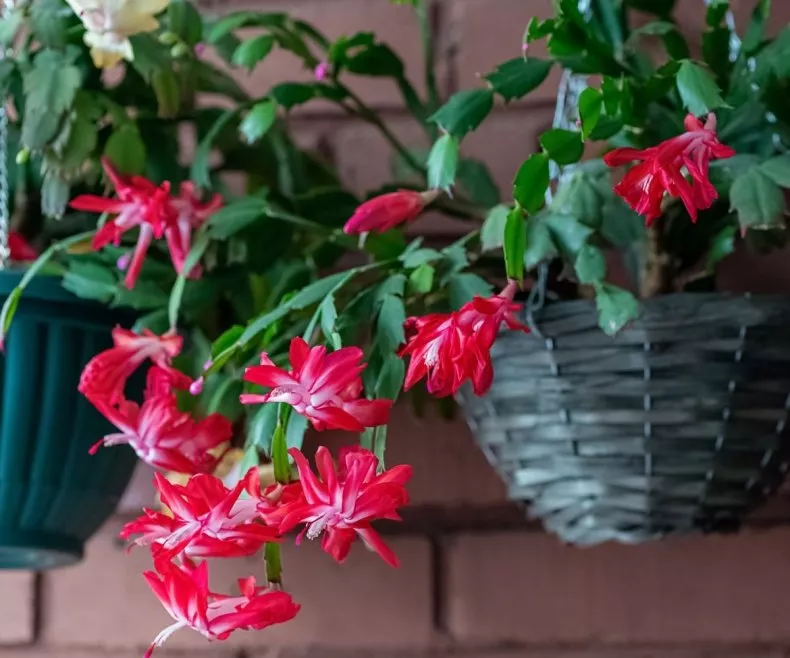
The plant is so named because it often blooms in the Northern Hemisphere around the Christmas season. The blossoms that appear at the tips of its segmented stems are stunning in their beauty and range in color from pink and red to white and yellow. The Christmas cactus is well-liked all over the world because of its gorgeous blossoms and the fact that they bloom throughout the holiday season.
Read: Propagate Elephant Ear Plants: A Step-by-Step Guide
The Christmas Cactus, however, is more than just a lovely face; it makes for a great houseplant overall. It’s hardy, flexible, and may live for decades; in fact, some carefully nurtured specimens have lived for more than a century.
Christmas Cactus Attributes
| Scientific Name | Schlumbergera bridgesii |
| Common Name(s) | Christmas Cactus, Holiday Cactus, Crab Cactus |
| Origin | Cloud forests of Brazil |
| Plant Type | Succulent, Cactus |
| Light Requirements | Bright, indirect light |
| Water Requirements | Regular, but let the soil partially dry between watering |
| Soil Type | Well-draining soil; mixture of potting soil, peat moss, and coarse sand |
| Temperature | 60-70°F (15-21°C) during growth season, slightly cooler during rest period |
| Humidity | Moderate to high |
| Fertilizer | Balanced houseplant fertilizer during growth season |
| Bloom Time | Late Fall to Winter, typically around Christmas |
| Flower Color | Red, pink, white, purple, orange depending on variety |
| Propagation Method | Stem cuttings |
| Toxicity | Non-toxic to pets |
| Lifespan | Can live for several decades with proper care |
| Special Features | Blooms during the holiday season |
| Care Level | Easy to moderate |
Christmas Cactus Propagation:
If you’re looking for cactus to spread, Christmas cactus are a great option. They are simple to multiply, and the people in your life will appreciate receiving one as a holiday present. When in bloom, a Christmas cactus or two can offer a dash of natural beauty to your home’s decor.
Christmas Cactus Cutting
Getting a healthy cutting of your Christmas Cactus is the first and probably most important stage in the propagation process. Even though it’s a simple process, you need to do it slowly to make sure your future plant thrives. For best results when propagating, please refer to the following thorough instructions.

Selecting the Perfect Stem
Pick out a healthy stem of Christmas Cactus stem to use as a cutting tool. There need to be between three and five segments in this stem. The leafy, fleshy pieces of the stem are called segments. The stem’s strength and lush green hue are signs of good health and ready-to-spread potential.
The Right Time
Once the Christmas Cactus’s flowering season is over in the spring is the ideal time to take a cutting. Because of this, the plant is able to divert its resources from bloom maintenance to the development of the new cutting.
Tools
To make the cut, employ a scissor or knife that has been recently cleaned and sharpened. This is crucial since a dirty or dull tool can cause serious harm to a plant, and even transfer illness to it. Before and after each use, disinfect the instrument by wiping it down with rubbing alcohol.
Cutting Process
Just above the second joint, make a clean cut. When two separate pieces come together, they form a joint. By snipping at this node, you can stimulate the mother plant into producing additional branches, resulting in a bushier plant later on.
Preparation
After you’ve taken the cutting, trim off the parts that will be buried in the ground. This ensures their longevity once planted and boosts their chances of spreading.
Handling
Use caution when slicing. Segments of the Christmas Cactus are more fragile than those of other cactus due to the absence of spines.
Read: How to Propagate Snake Plant
Callusing
The term “callus” is used to describe the process by which plant tissue at the site of a lesion becomes rigid or thickened. This naturally occurring mechanism in plants protects the injury from drying out and infections in much the same way as a scab grows on a cut on human skin. For the cutting to live and flourish, this barrier is crucial for plant propagation.
Callus formation on Christmas cactus cuttings begins when the stem is allowed to rest in a cool, dry environment. During this short hibernation (a few days up to a week), the plant is able to focus all of its resources on mending the injury. The severed end will harden and callus over with time. Temperature and humidity play a role in how long it takes for callusing to occur.
It’s very important to remember to hold off on watering at this period. Wetness at this time can cause rot, which will slow the cutting’s development. When a healthy callus has developed on the cutting, it can be replanted.
Although you may want to rush the callus formation process, remember that being patient is essential. Building a strong, robust callus is the first step toward a robust Christmas Cactus. By learning about and accommodating this built-in defense mechanism, you may help your cutting flourish as it develops into a fully functional plant.
Planting
Once the end of the callus formation process is complete, the cutting from your Christmas Cactus can be planted. At this point, your cutting has become a fully functional plant in its own right. The detailed procedures for this are as follows:
Choosing the Right Soil
Soil with good drainage is ideal for Christmas cacti. The best option is to use a commercially available mix made specifically for succulents and cacti. On the other hand, you can make your own by combining potting soil, coarse sand, and peat moss in a 1:1:1 ratio. The Christmas Cactus naturally grows in the cloud forests of Brazil, and this mixture simulates those circumstances by providing great drainage and keeping just the proper amount of moisture.
Pot selection
Your Christmas cactus cutting needs a pot no bigger than two or three inches in diameter. Root rot can be avoided by ensuring the pot has drainage holes. Because of its porous structure, excess moisture may easily drain from a terracotta pot, making it an excellent choice.
Planting process
To prepare the soil, water it thoroughly. Plant the cutting with the calloused end facing up approximately one inch into the ground. There should be one or two levels above ground.
Location
Put the planter somewhere that gets lots of bright, indirect light. Even though Christmas cactus aren’t actually desert cactus, they nonetheless require bright conditions to thrive. But their leaves can get burned if they are exposed to strong sunlight.
Initial watering
Lightly water the area surrounding the cutting after planting to help it settle into the soil. Don’t let the soil completely dry out.
Patience
Your cutting will need several weeks to begin rooting. Don’t test for root development by pulling on the cutting. Instead, you should keep an eye out for signs of fresh growth to confirm that the cutting has taken.
Care for the cutting
A Christmas cactus cutting, once planted, requires careful tending for optimal development. Post-planting maintenance entails basically supplying the ideal growing conditions and nutrients for your young plant to flourish. Here is a comprehensive manual:
Watering
Keep the soil moist, but not soggy, during the first few weeks. Root rot, caused by overwatering, stunts the cutting’s development. The top inch of soil should be touch-dry before watering.
Light
Place the cutting where it will receive direct but bright sunshine. Christmas cacti need indirect or filtered light rather than direct sunlight. The best orientation for a windowsill is north or east.
Temperature
Christmas cacti thrive in temperatures between 60 and 70 degrees Fahrenheit (15 and 21 degrees Celsius). Make sure the plant isn’t going to be harmed by sudden temperature shifts, drafts, or heat sources.
Humidity
Christmas cacti thrive in high humidity because their natural habitat is the moist tropical forests of Brazil. Place the pot on a tray with stones and water, making sure the pot is not sitting in the water, to boost humidity in your home if the air is dry.
Root development
It takes time for roots to develop. A few weeks to a couple of months is about right for the cutting to start rooting. When you pull on anything and feel resistance, that’s a good sign that roots are forming.
Fertilization
After the cutting has roots and new growth has appeared, begin fertilizing it once a month in the spring and summer with a diluted (50% strength) balanced houseplant fertilizer.
Read: Types of Pine Trees: A Complete Guide
Transplantation
Finally, after months of care, your Christmas Cactus cutting is ready to be transplanted and continue growing. After a year or so, when the plant has outgrown its original pot, it is ready to move on to a more suitable container. To assist you go over this stage, below is a comprehensive guide:
Recognizing the Signs
It may be time to repot your Christmas cactus if you see it getting root bound in its current container or if it starts to dry up between waterings. Roots growing out of the drains are another common occurrence.
Choosing the Right Pot
Make sure the new pot has drainage holes much like the first one you planted in. A pot that’s too big can cause issues with overwatering, so it should be just a little bit bigger than the one it’s replacing. A container that is only an inch or two wider will do in most cases.
Preparing the Pot
Put some cactus and succulent soil that drains properly into the new pot. You can buy a premade mixture, or you can combine equal parts of potting soil, gritty sand, and peat moss to make your own.
Transplanting Process
The first step in transplanting a Christmas cactus is to carefully remove it from its current pot. Remove any old, compacted soil and gently loosen the roots with your fingers. Spread the plant’s roots out across the top of the new dirt in the new pot. To ensure the plant’s stability, fill in the space surrounding it with extra soil, but avoid compacting it.
Post-Transplant Care
After the plant has been transplanted, give it a good soaking of water and allow the excess to drain. After transplanting, it’s best to give the plant a few days in the shade to recover from the ordeal. You can return the plant to its regular location with bright indirect light once it has established itself. Read more…


