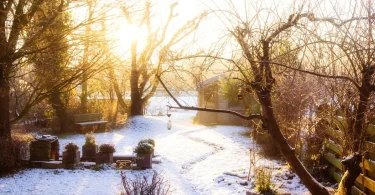
Winter can be harsh on your garden, especially on delicate blooms and young plants that struggle to survive freezing temperatures. However, with the right mulching methods, you can mulch for protecting winter blooms, keep the soil warm, and help your plants thrive even in the coldest months.
Mulch acts as a natural blanket for your garden, reducing temperature fluctuations, retaining moisture, and shielding roots from frost damage. In this guide, you’ll learn how to use mulch for protecting winter blooms effectively and safely.

Why Mulching Is Essential in Winter?
Mulching is one of the most important winter gardening tasks. Here’s why it matters:
1. Protects Roots From Freezing
Cold temperatures can freeze the top layer of soil, preventing plant roots from absorbing water. Mulch insulates the soil and keeps roots warm.
2. Prevents Moisture Loss
Winter winds and dry air can dehydrate soil quickly. Mulch traps moisture and slows evaporation.
3. Reduces Frost Heaving
Constant freezing and thawing can push roots upward and expose them. Mulch stabilizes soil temperature and prevents this shifting.
4. Shields Bloom Buds
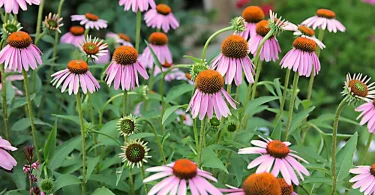
Winter-flowering plants like pansies, hellebores, and violas benefit from a protective layer around their base.
What Type of Mulch for Protecting Winter Blooms?
Not all mulches work the same way. Some are better suited for winter protection because they insulate well.

Recommended Winter Mulches
- Straw
- Shredded leaves
- Pine needles
- Wood chips
- Bark mulch
- Compost
Avoid These
- Stone or gravel (they get cold and provide no insulation)
- Fresh grass clippings (they rot quickly)
- Thick layers of sawdust (can suffocate soil)
How to Apply Mulch to Protect Winter Blooms
Follow these simple steps to mulch your winter-blooming plants correctly:
1. Prepare the Soil First
Before adding mulch:

- Remove weeds
- Clear debris
- Gently water the soil if it’s dry
Moist soil traps warmth more effectively.
2. Add Mulch at the Right Time
- Timing is key.
Apply mulch after the first light frost, not before. - Early mulching traps warm air and can attract pests. Light frost ensures plants enter dormancy safely.
3. Apply the Correct Thickness
Use 2–4 inches of mulch around winter blooms.
- Thin layers won’t protect well
- Thick layers can suffocate roots
If temperatures drop extremely low, you may increase to 5 inches temporarily.
4. Keep Mulch Away from Stems
- Leave 2–3 inches of space around stems and plant crowns.
- This prevents moisture buildup, mold, and rot.

5. Cover Bloom Buds Lightly
For winter-flowering plants:
- Keep flowers uncovered so they receive sunlight
- Add a light layer of mulch around the base
- Do not bury the entire plant
6. Replenish Mulch Throughout Winter
Wind and rain can break down mulch, so check it every 3–4 weeks.
Add more if the layer becomes thin.
Best Winter Bloomers to Protect With Mulch
These plants benefit most from winter mulching:

- Pansies
- Violas
- Winter jasmine
- Hellebores
- Primroses
- Snowdrops
- Cyclamen
- Christmas roses
Mulch ensures they stay strong and blossom beautifully despite cold conditions.
Extra Tips for Using Mulch in Winter
Use evergreen boughs (pine branches) for extra insulation
Lightweight, breathable, and protective.
Combine mulch with frost cloth
Great for extreme cold waves.
Avoid overwatering after mulching
The soil retains moisture longer.

Remove heavy snow from blooms
Gently shake off snow so flowers don’t get crushed.
When to Remove Mulch After Winter
As spring approaches and temperatures warm up:
- Gradually pull mulch back from plant bases
- Avoid removing it all at once
- Keep a thin layer to prevent spring weeds
Slow removal allows plants to adjust to warmer conditions without shock.
Final Thoughts
Mulching is one of the simplest yet most effective ways to protect your winter blooms. With the right mulch type, correct application methods, and proper timing, your garden can stay healthy, vibrant, and full of color even during the coldest months.
By following these tips, you’ll ensure your winter flowers not only survive, but thrive.