Introduction to No-Dig Gardening: What It Is and Why It Works
No-dig gardening is a revolutionary approach to cultivating thriving gardens without the traditional need for tilling or digging the soil. Instead of breaking up the soil, you build layers of compost, organic matter, and mulch directly on its surface. By adopting this method, you allow nature to do much of the work for you, fostering a healthier environment for your plants while conserving your energy. This technique is particularly suited for beginner gardeners who want to achieve productive results with less labor-intensive methods.
When you dig or till the soil, it disrupts the natural structure, exposing dormant weed seeds and harming essential microorganisms. No-dig gardening avoids this disruption, preserving the integrity of the soil and encouraging the activity of beneficial organisms such as earthworms, fungi, and bacteria. These organisms naturally improve soil fertility while maintaining aeration and drainage. This means your garden can remain fertile, ready for planting, and free of weeds with minimal effort on your end.
One of the key principles of no-dig gardening is the layering process, often referred to as “sheet mulching” or “lasagna gardening.” You’ll create distinct layers using materials like cardboard, compost, straw, and wood chips. These layers will decompose over time, enriching the soil underneath while suppressing weeds. The result is a nutrient-rich environment that supports vigorous plant growth and eliminates the need for constant weeding and digging.

What makes no-dig gardening especially effective is how it mimics the processes found in natural ecosystems. In forests, for example, organic matter like fallen leaves and decaying plants accumulates on the ground, nurturing the soil below without disturbance. You’ll harness these same principles to create a self-sustaining environment for your garden.
Transitioning to no-dig methods also offers environmental benefits. Because the soil remains undisturbed, there’s less risk of erosion, and better carbon sequestration occurs. This approach reduces exposure to chemicals often used in conventional farming, promoting biodiversity and fostering a sustainable gardening practice.
By choosing no-dig gardening, you’re embracing a method that works with nature rather than against it. This approach is much easier on your back, saves time, and results in healthier, more productive plants. It’s the perfect starting point for beginners and an opportunity to connect deeply with the natural processes that sustain life in the garden.
Benefits of No-Dig Gardening for Beginners
When you choose no-dig gardening, you create a gardening method that is less demanding while still delivering great results. It eliminates the need for heavy labor, such as turning over soil, making it ideal for beginners who may feel intimidated by traditional gardening tasks. With no-dig gardening, you avoid disrupting the natural structure of the soil, which helps to preserve nutrients and allows microorganisms to thrive. These microorganisms play a vital role in breaking down organic matter, ensuring your plants grow healthy and strong.
One significant advantage is the reduction of weeds. When you layer materials like compost, mulch, and cardboard, you suppress weeds effectively, minimizing the need for constant weeding. This saves you time and effort in the long term. Additionally, watering becomes less frequent because the layers retain moisture better than disturbed soil. As a beginner, this means you won’t have to monitor your garden as much to keep it hydrated.

No-dig gardening also promotes eco-friendly practices. By avoiding tilling, you prevent carbon release from the soil and contribute to reducing your carbon footprint. Supporting the ecosystem in your garden allows local wildlife, such as earthworms, to thrive, which naturally improves soil quality.
This gardening method is flexible and works well in small spaces. Whether you have limited room for raised beds or simply wish to start gardening on an existing lawn, you can adapt no-dig techniques to suit your area. It encourages creativity in layout design and crop selection, making it an enjoyable experience as you learn about gardening.
Essential Tools and Materials You’ll Need to Get Started
When starting your no-dig gardening adventure, having the right tools and materials on hand is essential. This method is low-maintenance, but a few key items will make your setup efficient and successful.
Tools for Preparing Your Garden Area
- Garden Fork or Pitchfork: While digging is off the table, a garden fork can help loosen compacted soil for better water and nutrient absorption.
- Mulching Fork: This will make spreading your organic materials, such as straw or wood chips, much easier and more effective.
- Wheelbarrow or Garden Cart: Transporting compost, mulch, and tools is simpler with a sturdy wheelbarrow or garden cart.

Materials for Layering and Mulching
- Cardboard or Newspaper: Use these as your first layer to smother weeds. Be sure to remove any staples or tape from cardboard before using it.
- Compost: Apply rich, finished compost on top of your weed barrier. This will act as the foundation for planting and provide nutrients for your plants.
- Mulch: Organic mulch like straw, bark chips, or shredded leaves is essential for covering the soil and retaining moisture.
- Organic Matter: Incorporate kitchen scraps, aged manure, or grass clippings into your garden to boost fertility over time.
Additional Handy Supplies
- Gloves: Protect your hands while handling mulch and soil. A comfortable, durable pair of gardening gloves is a must.
- Pruners or Scissors: These are helpful for cutting back plants or harvesting crops.
- Watering Can or Hose with Spray Nozzle: Ensuring your garden gets consistent moisture is critical for healthy growth.
Tips for Sourcing Materials
Look for free or low-cost materials in your community. Local farms might offer straw, and neighbors may have excess leaves. Many hardware stores or recycling centers provide cardboard boxes for free. By being resourceful, you’ll save money and reduce waste while setting up your no-dig garden.
Starting with these essentials will provide the foundation you need to grow a thriving no-dig garden right from the beginning.
Choosing the Perfect Location for Your Garden
Selecting the ideal location is one of the most important steps in starting a no-dig garden. You need to consider several factors to ensure your garden thrives without requiring extensive effort or maintenance. Start by observing your space carefully, paying attention to sunlight, accessibility, and soil conditions.
Sunlight Requirements
No-dig gardens need at least 6-8 hours of direct sunlight every day, especially if you’re planning to grow vegetables or herbs. Identify sunny areas in your yard and note how light changes throughout the day. If your garden site is partially shaded, focus on planting crops that can tolerate shade, such as lettuce, spinach, or certain herbs. Avoid spots blocked by large trees or buildings unless you only intend to grow shade-loving plants.
Accessibility and Convenience
A successful garden is one you can access easily. Pick a site close to your home or a frequently visited area so tending to it doesn’t feel like a chore. Convenience is crucial; you’ll need quick access to water sources for irrigation and space to store tools. Consider pathways to avoid trampling plants and soil as you navigate in and around the garden.
Soil and Drainage
Although you won’t be digging, assessing the soil’s current condition is essential. Ensure the ground isn’t prone to waterlogging, as standing water can suffocate plant roots and encourage pests. If possible, choose a site with slightly sloped terrain to promote natural drainage. If the area is uneven, you can add your no-dig layers to correct this.

Avoid Environmental Challenges
Check for potential challenges such as strong wind exposure or too much foot traffic. Wind can dry out plants and damage crops, so find a protected area or consider adding windbreaks like hedges, fences, or netting. Avoid locations near driveways or play areas where accidental disturbances may occur.
Taking all these elements into consideration will set you up for a no-dig garden location where your plants can flourish with minimal effort.
Preparing the Ground: How to Lay the Foundation of a No-Dig Garden
To begin a no-dig garden, you need to start by selecting the right location. Choose a site that receives ample sunlight, ideally 6–8 hours per day, as this is critical for most plants. Ensure the area has good drainage and is relatively flat to maintain consistent soil layers. Once you’ve identified the spot, you can start preparing the ground for your no-dig setup.
Begin by clearing the area of any debris such as rocks, sticks, or large weeds. You don’t need to remove the grass or till the soil—this is one of the key principles of no-dig gardening. If the area has tall weeds or grass, you can mow it down to ground level to make layering easier. Ensure the surface is relatively smooth to prevent uneven layering of materials.
The next step involves suppressing the existing vegetation. Lay down a thick layer of biodegradable material, such as cardboard or layers of newspaper, across the entire area. Make sure to overlap the edges by a few inches to prevent weeds from growing between gaps. Wet the cardboard or newspaper thoroughly to help it decompose faster and stay in place while you build additional layers.

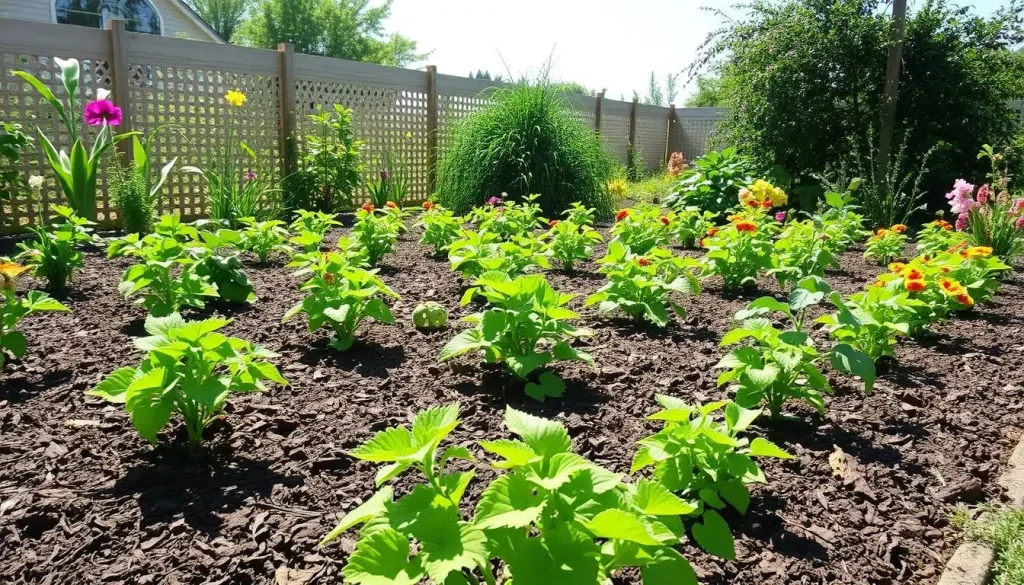
Now, focus on creating the growing medium. On top of the biodegradable layer, spread a combination of organic materials to nourish the soil. Start with a base layer of compost, well-rotted manure, or a mix of green and brown plant materials. Use roughly 4–6 inches of compost to form a nutrient-rich surface. Add straw, leaves, or grass clippings to maintain the balance of organic matter.
Finally, give the layered garden bed time to settle. If possible, let the bed rest for a few weeks before planting. This allows the layers to break down and begin forming healthy, fertile soil. During this time, watering the area occasionally can speed up the decomposition process.
Layering: The Secret to Building Healthy Soil
When starting a no-dig garden, layering is a fundamental technique that mimics the natural formation of fertile topsoil. This process, often called “sheet mulching” or “lasagna gardening,” involves layering organic materials to create nutrient-rich, well-draining soil that improves over time. Here’s how you can set up effective layers for your no-dig garden.
- Start with a Weed Barrier Use a biodegradable material like cardboard or thick layers of newspaper to suppress weeds. Soak it with water to help it break down faster and ensure it lays flat on the ground. Overlap the edges to prevent weeds from sprouting through the cracks.
- Add a Layer of Coarse Organic Material Next, layer coarse materials such as sticks, small branches, or straw. This base layer should help with drainage and create air pockets in the soil, preventing it from becoming compacted.
- Incorporate Green and Brown Organic Layers Alternate between “green” materials (like vegetable scraps, grass clippings, or coffee grounds) and “brown” materials (like dried leaves, shredded paper, or sawdust). Green layers provide nitrogen, while brown layers add carbon, creating a balance that encourages composting.
- Top with Compost and Soil After building your layers, spread a few inches of well-aged compost or nutrient-rich topsoil over the top. This will ensure your plants have immediate access to the nutrients they need to grow.
- Add Mulch to Retain Moisture Finish with a thick mulch layer, like straw or wood chips, to retain moisture, regulate soil temperature, and suppress weeds further. As the layers decompose, they’ll enrich the soil naturally.

With proper layering, you’ll nurture a thriving ecosystem under your no-dig garden. Remember to refresh the top layers periodically to replenish nutrients and maintain moisture retention.
Selecting the Right Plants for Your No-Dig Garden
Choosing the right plants for your no-dig garden is essential to its success. You need to consider factors such as climate, soil conditions, and sunlight exposure to ensure your plants thrive. Start by assessing the local climate in your region. Different plants flourish in different temperatures and humidity levels, so it’s important to select varieties that are well-suited to your area. For instance, leafy greens like lettuce and spinach grow well in cooler weather, while tomatoes and peppers prefer warmer conditions.
Next, think about the sunlight availability in your garden space. Observe how much direct sunlight your plot receives daily. If your garden gets full sun (6-8 hours per day), you can grow crops like cucumbers, squash, and beans. For shaded areas, opt for shade-tolerant plants such as kale, Swiss chard, or certain herbs like mint and parsley.
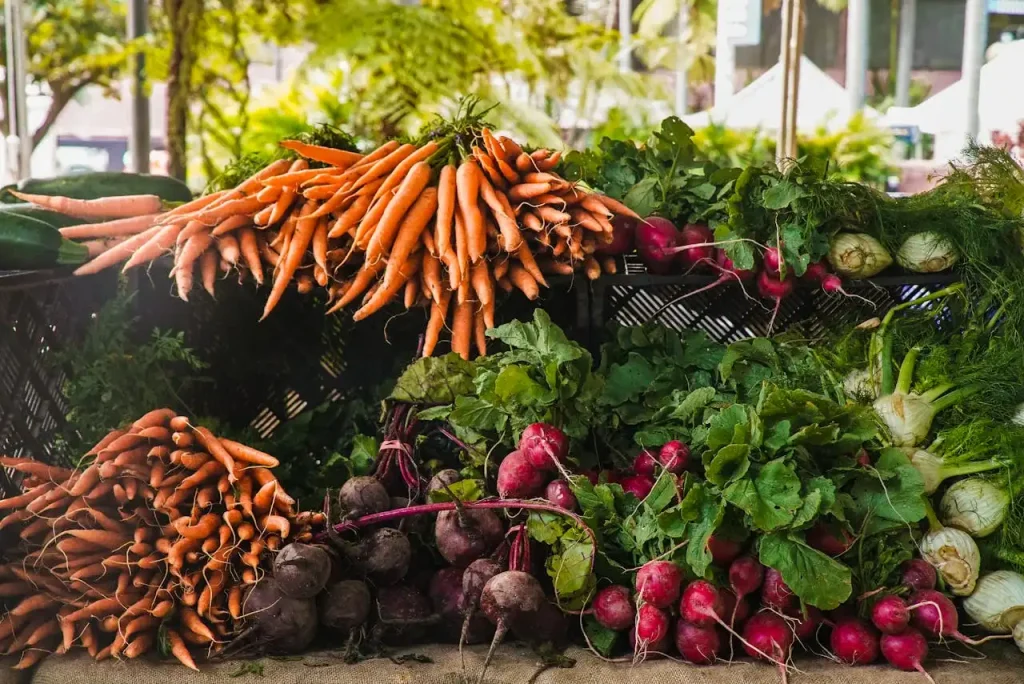
You should also consider your soil type and organic matter. While the no-dig method builds soil health over time, some crops are better suited to specific soil conditions. Root vegetables, such as carrots or radishes, need loose, less compact soil, so they’re ideal after a few months of layering compost and mulch.
Don’t forget about plant compatibility. Practice companion planting to maximize yields and deter pests. For example, plant basil near tomatoes to improve flavor and keep insects away.
Lastly, select plants based on your personal preferences. Grow vegetables, fruits, or herbs that you and your family love to eat. This ensures that your efforts will be both rewarding and practical.
Tips for Maintaining and Caring for Your No-Dig Garden
Maintaining your no-dig garden requires consistent yet simple care to keep it thriving. Here are practical tips to help you succeed:
1. Water Wisely
- Regular watering is vital, especially for the top layers of your no-dig garden. Check the moisture levels daily by testing how dry the soil feels a few inches deep.
- Always water early in the morning or late in the evening to avoid evaporation and prevent plants from wilting during hot afternoons.
- Opt for drip irrigation systems or soaker hoses, as they efficiently deliver water directly to the soil without disturbing mulch layers.
2. Refresh Mulch Regularly
- Over time, mulch breaks down and contributes nutrients to the soil. Make it a habit to replenish the mulch level periodically to maintain moisture retention and weed suppression.
- Use organic materials like straw, grass clippings, or shredded leaves to maintain consistency with no-dig principles.
3. Feed Your Soil
- The health of your soil directly impacts your plants. Add compost or well-rotted manure every growing season to top up nutrients without disturbing layers beneath.
- You can sprinkle rock dust or worm castings on the soil to enhance the mineral content.
4. Watch for Weeds
- Though no-dig gardening tends to reduce weeds, you may find a few popping up occasionally. Remove weeds gently, ensuring you don’t disturb the surface.
- Applying more mulch will often prevent weed growth for the long term.
5. Practice Crop Rotation
- Rotating your crops season by season ensures proper nutrient use and reduces the risk of pests or diseases. Group plants with similar needs together, but change their planting location annually.
6. Prevent Soil Compaction
- Avoid walking or kneeling directly on the garden bed. Soil compaction can reduce air circulation and water absorption. Use pathways to safely access your garden without damaging its structure.
7. Monitor Pests and Diseases
- Keeping a close eye on your plants helps in identifying issues early. If insect infestations occur, encourage beneficial insects like ladybugs to naturally control pests.
- Apply organic treatments or handpick pests to maintain your garden’s health without synthetic chemicals.
8. Harvest Mindfully
- When harvesting, avoid pulling plants up forcefully, which can disrupt the soil structure. Use scissors or pruners to snip produce like vegetables or herbs.
By following these care tips, you’ll nurture a productive and resilient no-dig garden that rewards your efforts year-round.
Common Mistakes to Avoid as a Beginner No-Dig Gardener
As a beginner in no-dig gardening, it’s easy to overlook some key principles. By knowing what to avoid, you can set yourself up for greater success from the start. Below are frequent mistakes and tips to help you prevent them:
1. Skipping Soil Preparation
- Avoid placing organic matter directly on compacted soil without proper loosening at the start. While no-dig gardening minimizes disturbance, heavily compacted soil may need an initial aeration before adding layers.
- Ensure you add enough organic material, such as compost or well-rotted manure, to improve drainage and fertility.
2. Using Poor-Quality Organic Matter
- Refrain from using compost that isn’t fully decomposed. Incomplete compost can leach nutrients and invite pests or diseases.
- Never use materials contaminated with weed seeds, chemicals, or invasive plant species, as these can compromise your no-dig bed.
3. Neglecting Weed Barriers
- Don’t skip a weed-suppressing layer, such as cardboard or thick newspaper, when starting your bed. Doing so can allow weeds to grow through, defeating the purpose of no-dig gardening.
- Overlap sheets of your weed barrier carefully to block all light from reaching weeds underneath.
4. Overwatering or Under-Watering
- The layers of a no-dig garden can sometimes make it harder for beginners to gauge moisture levels. Test your soil regularly and water only as needed. Over-saturating can drown plants, while too little water dries out roots.
5. Planting Without Sunlight Considerations
- Place your garden in an area that receives enough sunlight for your chosen crops. Even the best-prepared no-dig bed won’t yield results if your plants get insufficient light.
6. Impatience with Results
- Don’t expect overnight success. The key to no-dig gardening is building layers of long-lasting fertility, which may take time to yield visible results. Stay consistent and observe your soil’s progress.
Avoid these common pitfalls and focus on creating a sustainable, thriving no-dig garden for the best outcomes.
The Role of Composting in No-Dig Gardening
Composting is an essential component of no-dig gardening, as it supports soil health, fertility, and structure. By recycling organic matter, you create nutrient-rich compost that feeds your soil and helps your plants thrive. In a no-dig garden, composting not only replaces synthetic fertilizers but also contributes to building a healthy and balanced ecosystem.
You’ll use compost as the top layer in a no-dig garden. This organic material acts as a mulch to suppress weeds, retain moisture, and regulate soil temperature. Additionally, it slowly breaks down to enrich the soil with nutrients, promoting strong root growth in your plants. Unlike tilling, which can disturb soil microbes, adding compost from above keeps the soil ecosystem intact and flourishing.
To start composting, collect kitchen scraps like vegetable peels, coffee grounds, and eggshells, along with garden waste such as grass clippings, leaves, and small branches. Avoid adding meat, dairy, or oily foods, which can attract pests. Aim for a balance of green (nitrogen-rich) and brown (carbon-rich) materials to ensure efficient decomposition.
When layering compost in your no-dig garden, lay it 2–4 inches thick across your garden bed. This depth provides a sufficient nutrient reservoir while helping to suppress weeds. Over time, earthworms and soil organisms will pull the compost down, mixing it naturally into the soil layers below.
Incorporating compost into your no-dig approach reduces the need for external soil amendments. It’s a sustainable practice that mimics nature’s cycles and prevents soil compaction. By composting, you can give back to the soil, transforming your garden into a thriving, self-sustained system.
Seasonal Adjustments and Crop Rotation in No-Dig Gardening
No-dig gardening requires thoughtful planning throughout the year to align with seasonal changes. Each season brings varying conditions that affect soil and plant growth, meaning you must adjust your strategies to maintain soil health and maximize productivity. Understanding how to adapt your gardening practice to the seasons and incorporate crop rotation will make your no-dig garden more sustainable and thriving.
Adapting to Seasonal Changes
- Spring: As temperatures begin to rise, this is the ideal time to sow seeds directly into the soil or transplant seedlings. Use organic mulch or compost to protect the soil and prepare your beds for plants requiring rich nutrients. Spring offers excellent conditions for salad greens, peas, radishes, and herbs.
- Summer: Focus on watering strategies, especially during dry spells. Apply thick layers of mulch to retain moisture and prevent overheating of your soil. Summer crops like tomatoes, cucumbers, zucchinis, and peppers thrive with consistent mulching and monitoring.
- Fall: Transition to planting cool-weather crops like spinach, broccoli, and kale. As harvests wind down, replenish your beds with a fresh layer of compost or mulch to insulate the soil during the cooler months. Fall is also the time to collect crop residues for composting.
- Winter: Depending on your climate, winter might be when your garden rests. Cover empty beds with mulch or a winter cover crop like clover to prevent erosion and keep the soil biologically active.

Incorporating Crop Rotation
Crop rotation is integral to no-dig gardening, as it prevents nutrient depletion and reduces the risk of diseases or pests over time. Rotate your crops based on their families, nutrient needs, and growing habits.
- Group Plants by Their Families: Organize your crops into families (e.g., legumes, brassicas, root vegetables) to plan rotations effectively. Plant different families in the same bed each season.
- Follow Nutrient Cycles: Alternate heavy feeders like tomatoes with lighter feeders, such as beans or root crops, to balance soil nutrient demands.
- Reduce Pests and Diseases: Rotation disrupts the life cycles of pests or diseases that target specific plants. Avoid planting crops from the same family in successive years in the same spot.
Transitioning into seasonal adjustments and crop rotation practices will enhance your garden’s productivity and ensure long-term soil health. Stay attentive to your garden’s unique needs during each season for optimal results.
How to Scale Up Your No-Dig Garden Over Time
When you’re ready to expand your no-dig garden, the process is straightforward and flexible. Start by selecting additional areas where you wish to grow. Look for spots with direct sunlight for at least 6–8 hours a day, as most plants thrive in these conditions. Clear the intended area of weeds or grass by simply mowing them down and following the same layering method used initially.
Scaling up involves sourcing materials efficiently. As your garden grows, you might need larger quantities of cardboard, compost, and mulch. Consider partnering with local businesses like furniture stores or grocery markets that often have excess cardboard to spare. For compost, connect with local farms, garden centers, or composting facilities, as they may provide it in bulk at discounted rates.
Expand your garden beds in manageable sections. Rather than tackling a large area all at once, add one or two new beds each season. This approach prevents you from becoming overwhelmed while ensuring you can tend to each bed effectively. Remember to layer your materials as before: cardboard at the base, compost on top, and mulch as the final layer.
Use companion planting to make the most of your garden’s increased size. As you add more space, experiment with planting combinations that benefit each other, such as tomatoes with basil or carrots with onions. This will help maximize productivity while naturally deterring pests.

Keep an eye on your resource needs as your garden grows. Watering systems, such as soaker hoses or drip irrigation, can help you maintain consistent moisture levels across larger areas. Regularly assess the soil’s health and adjust your compost and mulch applications to sustain fertile, nutrient-rich layers.
By pacing yourself and cultivating new beds with care, your no-dig method will scale seamlessly as your gardening ambitions evolve.
Frequently Asked Questions About No-Dig Gardening
What is no-dig gardening?
No-dig gardening is a method of growing plants without turning or tilling the soil. Instead, you add organic materials like compost and mulch on top of the ground. This mimics nature’s way of building healthy soil, promoting microbial life while avoiding disruption to the soil structure.
Why is no-dig gardening beneficial?
No-dig gardening helps maintain soil health by preserving beneficial organisms like worms, fungi, and bacteria. It reduces soil erosion, improves water retention, and minimizes weed growth. Additionally, it’s less labor-intensive than traditional methods, making it ideal for beginners or those with limited physical capabilities.
Can I use no-dig gardening in any climate?
Yes, no-dig gardening can work in any climate as long as you adapt to local conditions. Cold climates may need thicker layers of organic materials for insulation, while arid areas might require more frequent mulching to retain moisture. Always observe how your soil responds and adjust accordingly.
What materials do I need for a no-dig garden?
You’ll need materials like cardboard to suppress weeds, compost to provide nutrients, and mulch to retain moisture. Grass clippings, straw, well-rotted manure, and shredded leaves are common options. Always prioritize organic, chemical-free inputs to ensure soil and plant health.
When is the best time to start a no-dig garden?
Fall is an excellent time to start because you can prepare the garden bed over winter. However, you can begin in spring or summer as well, especially if conditions allow you to source organic materials easily. Just layer your soil as needed and plant directly into the compost.
What plants thrive in no-dig gardens?
You can grow a variety of plants in a no-dig garden, including vegetables, herbs, flowers, and even fruit shrubs. Crops like tomatoes, lettuce, carrots, and beans are beginner-friendly. Always consider your local growing season and plant accordingly.
Do I still need to fertilize in a no-dig garden?
In most cases, the organic layers you add will provide sufficient nutrients for your plants. However, you may still need to supplement specific nutrients, like nitrogen or potassium, for heavy feeders like tomatoes or corn. Use natural fertilizers like compost tea or seaweed extract as needed.
Conclusion: Embracing a Sustainable and Low-Maintenance Gardening Lifestyle
You can transform your gardening experience by adopting a sustainable no-dig approach. This method works harmoniously with nature, allowing soil ecosystems to thrive while reducing physical effort. It’s ideal for beginners seeking an accessible way to start gardening or experienced gardeners aiming to simplify their routines without compromising results.
By prioritizing soil health, you encourage beneficial organisms to flourish, which leads to richer, more fertile ground for your plants. Instead of struggling with soil preparation that disrupts this natural balance, you harness the power of organic matter to create an environment where plants can grow abundantly. You’ll save time and energy while seeing visible improvements in the health of your garden over time.
To get started, focus on layering organic materials such as compost, straw, and mulch in your garden beds. These layers mimic what happens in nature and protect the soil structure beneath. Ongoing maintenance involves little more than adding new organic matter occasionally, keeping weeds at bay, and cultivating your chosen plants.
This gardening method also supports sustainability. By minimizing digging, you limit carbon emissions released from the soil, making the practice more environmentally responsible. Plus, the reduced need for fertilizers and pesticides benefits your wallet and reduces chemical exposure.
An added advantage is its versatility. No-dig gardening can be adapted to containers, raised beds, or even existing plots in your yard. Once you begin, you’ll find it calming and rewarding to work with a system that respects the earth’s natural processes. Transitioning to this approach invites you to be a steward of nature while enjoying a flourishing garden with less effort.